When we created our first button we did not explain to much about the screen
but it gave you a quick start. This guide shows what each section of the
button edit window is.
Touch Portal's Button Edit screen
This is the button edit screen of Touch Portal.
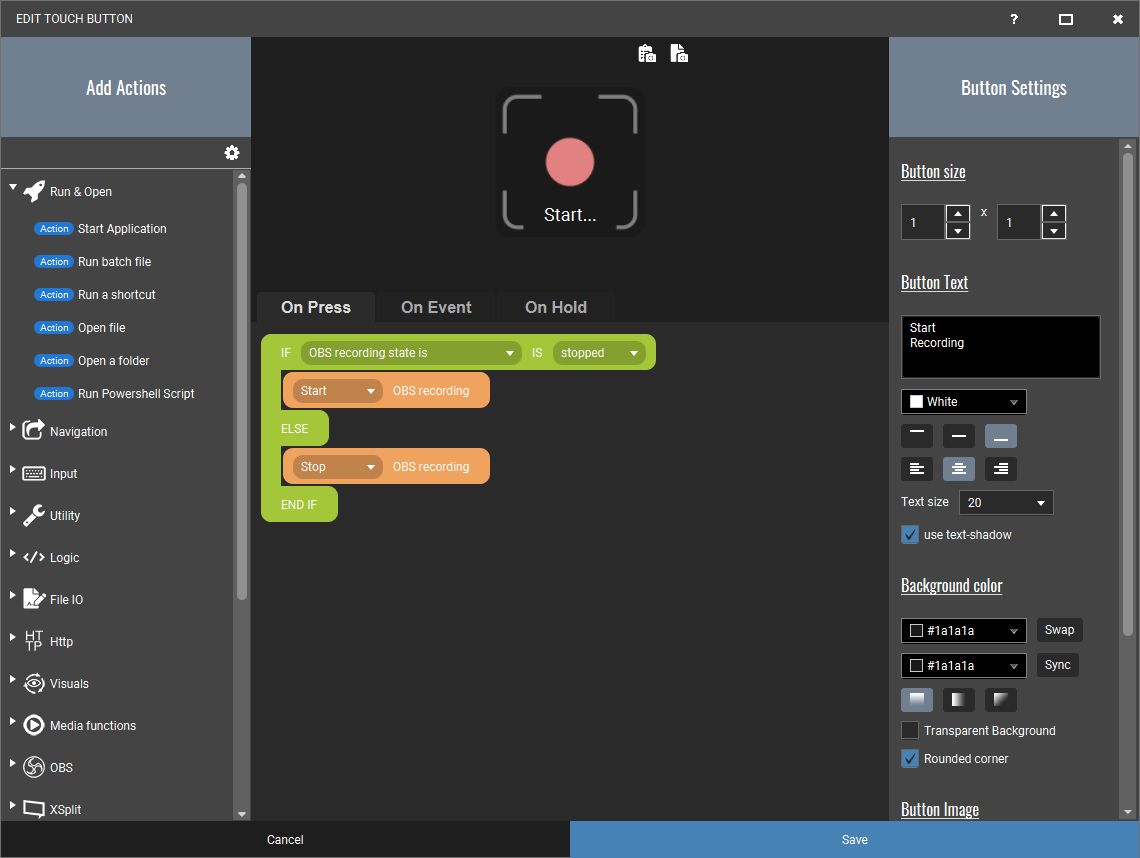
This is the screen where the magic happens. Here you can create the most
beautiful and most functional buttons you need for your task automation. Let's
divide the screen again in sections and explain what they are for.
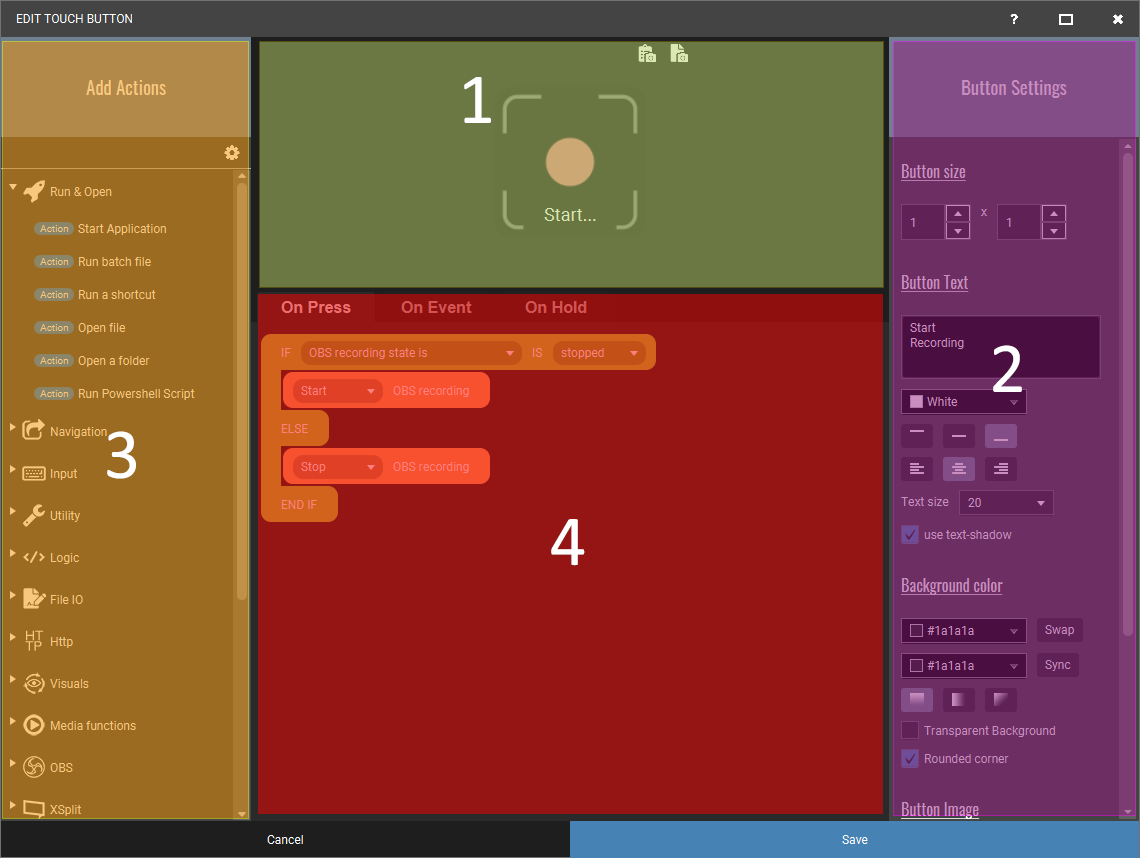
We have divided the main screen in 4 parts as you can see. Each part has its
own responsibility and we will explain what they are:
- The Button Preview shows how the button will look. The two icon
button on top allow you to make a snapshot of your button. A snapshot is
an image of the full button with all the required information to share with
others (including all the actions it will execute).
- The Button Settings section has all the options for you to alter
the looks of the button and set some default properties of your button.
- Touch Portals actions list is the full list of all actions
available to you to create awesome buttons. The actions can be added to the
buttons action events section (4) by clicking on them. All actions are placed
in categories. Plug-in actions will also be placed here on the bottom of the
list.
- The button action events section shows the events (On Press, On
Event and On Hold) with their list of actions. Adding actions to these
events will make them execute. All action in the On Press section will
be executed when the button is pressed. The actions in the On Event list
will executed whenever the event is triggered in the Touch Portal system.
The On Hold section (available from version 2.2) will allow a small
selection of the actions to be executed when the button is being held.
Back to Guide Overview